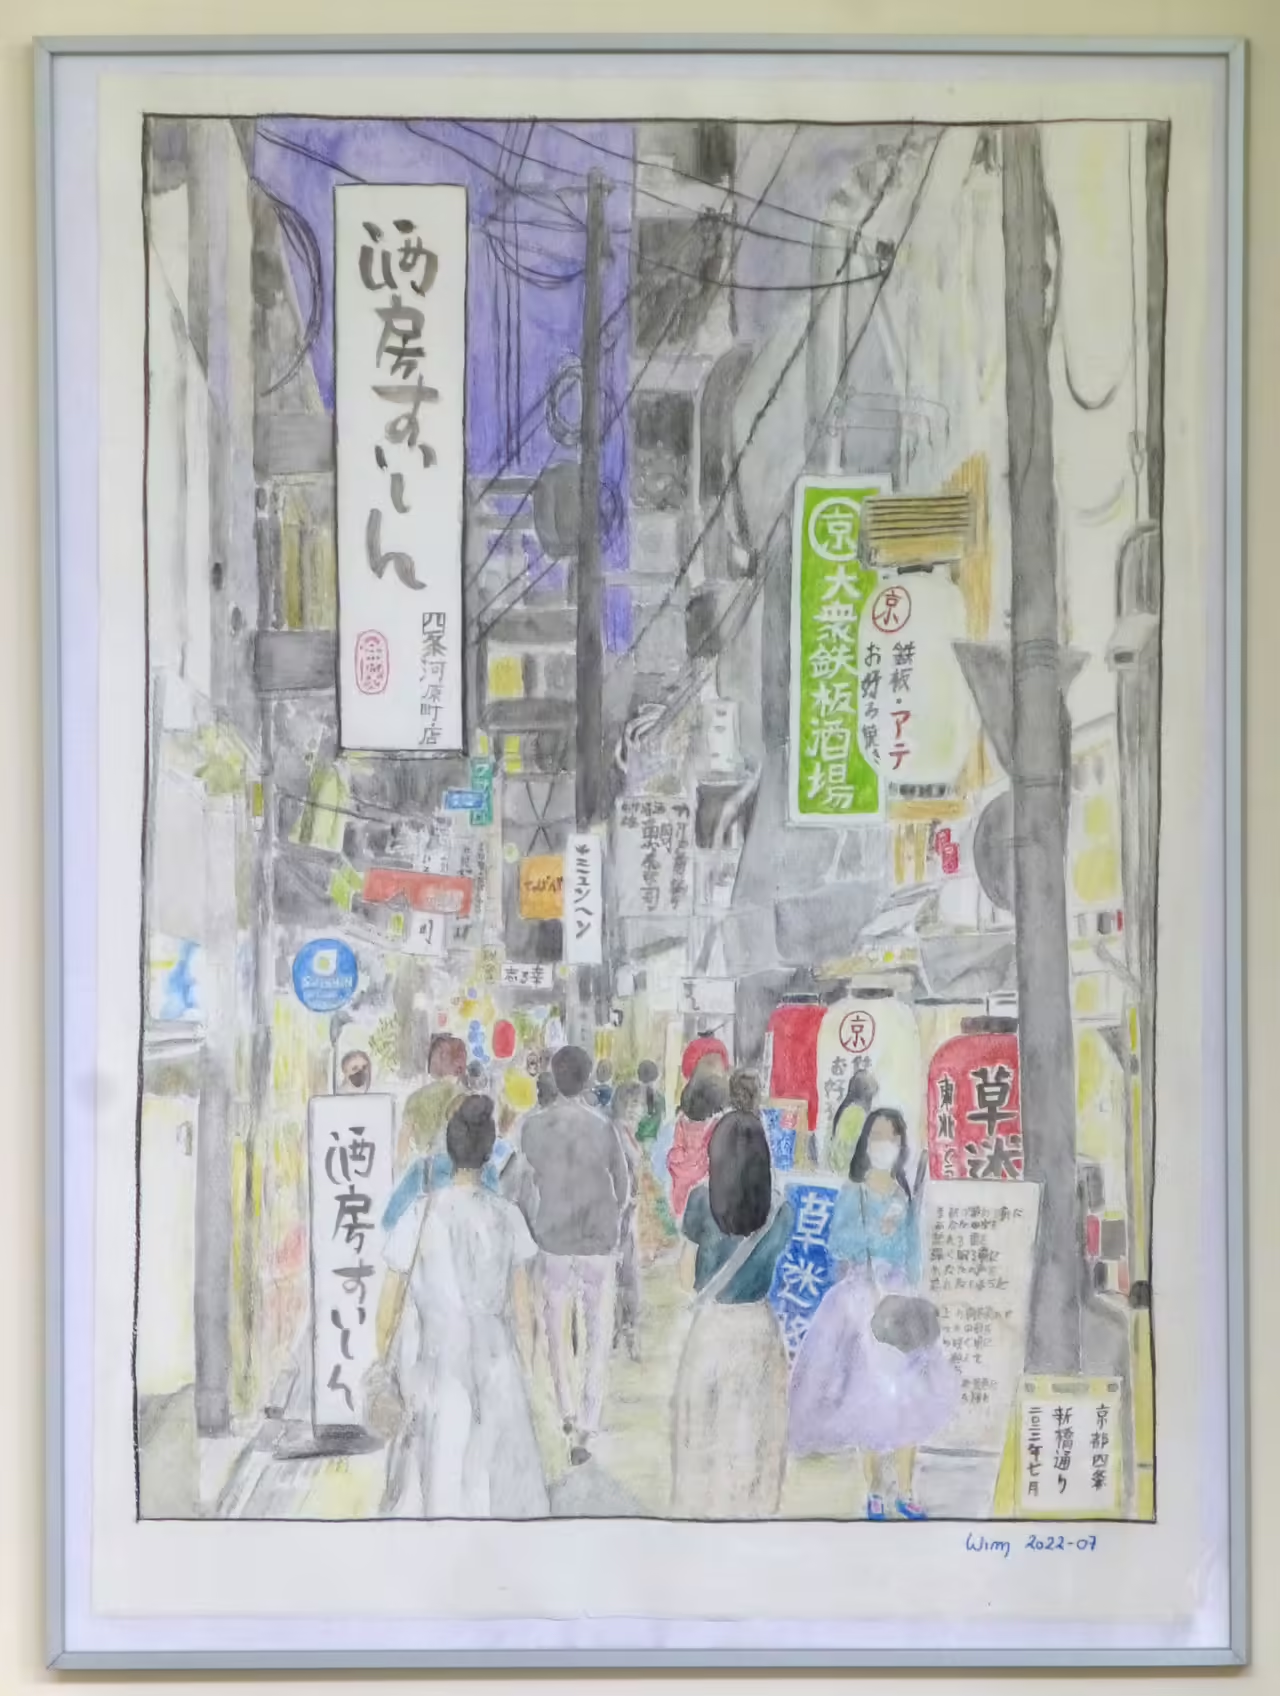
I’ve finished another watercolour, on a sheet of 56 cm × 76 cm ( 30×22 inches) so quite large. The paper is Fabriano Artistico 300 g/m² “not”, cold pressed with a rough finish. The materials I used are my usual combination of plain pencil and Derwent Inktense and Conté Aquarelle watercolour pencils. I started it at the end of March so it took about three months.
Topic
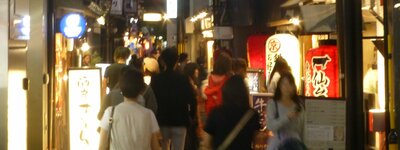
The topic is a night view of an alley in Kyōto, based on picture I took during my stay in 2018. I picked it because I wanted something with a lot of colour and detail, in portrait format. And because I love Kyōto. Working on that drawing takes me straight back there, to the warmth of the summer night, the typical smells, sounds and visual impressions. And just the feeling of being there.
In Japanese there is a word for this feeling of happy memories, natsukashii (懐かしい). It’s close to “nostalgic”, but without negative connotations. The dictionary says “fondly-remembered”.
Making a detailed drawing of a night scene is fun and challenging: because of the limitations of taking night shots with my compact camera without tripod, the original image is not entirely sharp; also, some of the brighter signs are washed out. And of course the details in the darker parts are quite lost. So I try to work out the signs and other missing parts by comparing various pictures and searching on the internet for additional, daytime pictures of that alley.
Especially the kanji (Chinese characters) on the signs are hard. If I would copy them without really understanding the characters, then the strokes would be wrong and that would be obvious to anyone who can read them. So I need to work out which kanji the often very stylised calligraphy represent. Then I can attempt to write them in the same way.
One of the things I like about drawing is that I can change whatever I like. A picture is already a lie, but in a drawing there are so many more ways in which you can alter the reality. Most of what is shown in the drawing was there on the picture. I only lied a little bit.
Context
The alley is called Shinbashi Dōri (真橋通り). It comes out onto a bridge over the Takasegawa (高瀬川), which is a narrow canal bordered with cherry trees. The bridge is called Shinbashi (真橋) and the alley takes it name from the bridge. It’s close to the much more famous Pontochō Alley (先斗町通り) and not far from the Gion Bridge over the Kamo river. The scene in the drawing is observed from the entrance of the alley from Kawaramachi Dōri (河原町通り), one of the main north-south thoroughfares.
Shinbashi Dōri runs parallel with Shijō Dōri (四条通り), one of the main roads running east-west. Already in the Heian era (around 800 CE), Kyōto (then called Heian-Kyō) was laid out on a grid pattern with the imperial palace facing south after the Chinese fashion and the main east-west roads counting up from the palace towards the south. The roads were simply numbered from 1 to 9 starting with Ichijō (#1) just to the north of the palace grounds, Nijō (#2) just to the south, then Sanjō (#3), Shijō (#4) and so on and ending at Kujō (#9). If you’ve read the Tale of Genji, you will recall that Genji had a Nijō residence and one of the important women in his life live was called the Rokujō have because her residence was on Rokujō.
Today, Shijō Dōri is the most well-known as it is a major shopping street and it runs to Gion bridge and the Gion quarter. Amazingly, all of these roads still exist, or at least there are still roads and alleys in Kyōto with those names in roughly the same place as the original ones.
Drawing process
The way I make a drawing like this is quite straightforward: I crop the image to the scene I want, then divide it into squares using guides. I divide the paper in the same number of squares, with pencil and ruler. For detailed parts, I divide the squares into smaller squares. Then I set the drawing up in pencil with the picture on my screen as reference.
For this particular drawing, I also looked at the position of the vanishing point and put in perspective guide lines.
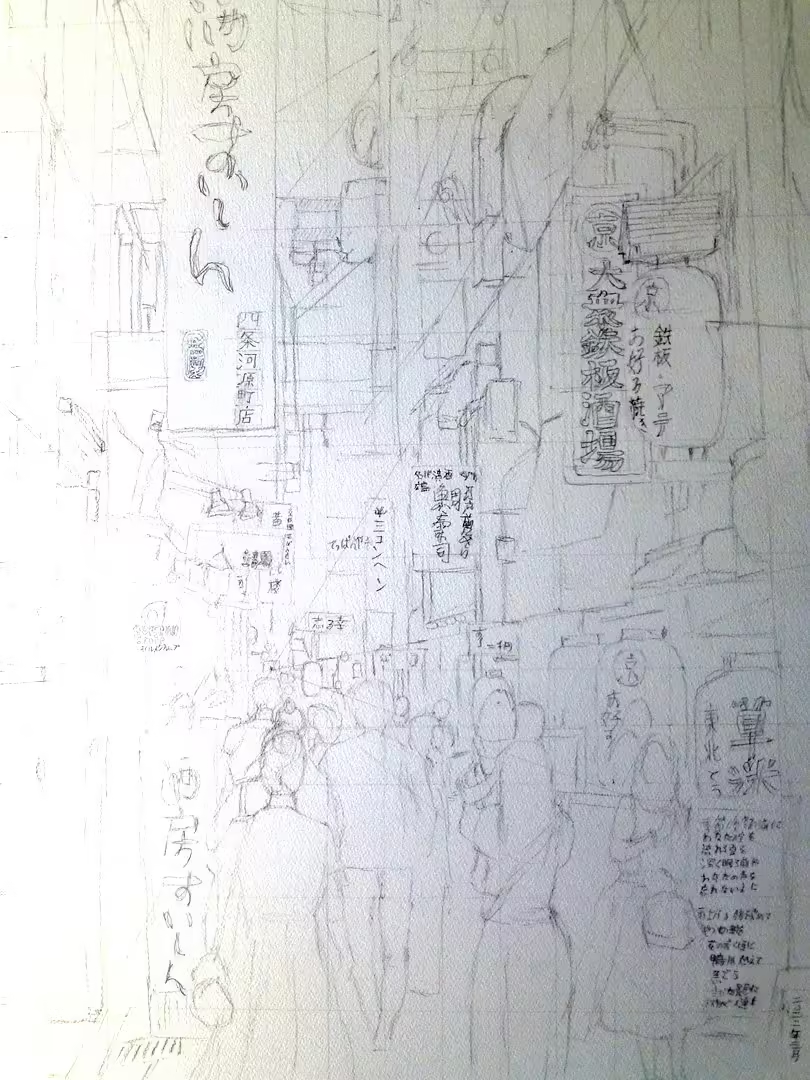
When I’m happy with that I will usually do some very rough shading and work out some of the details.
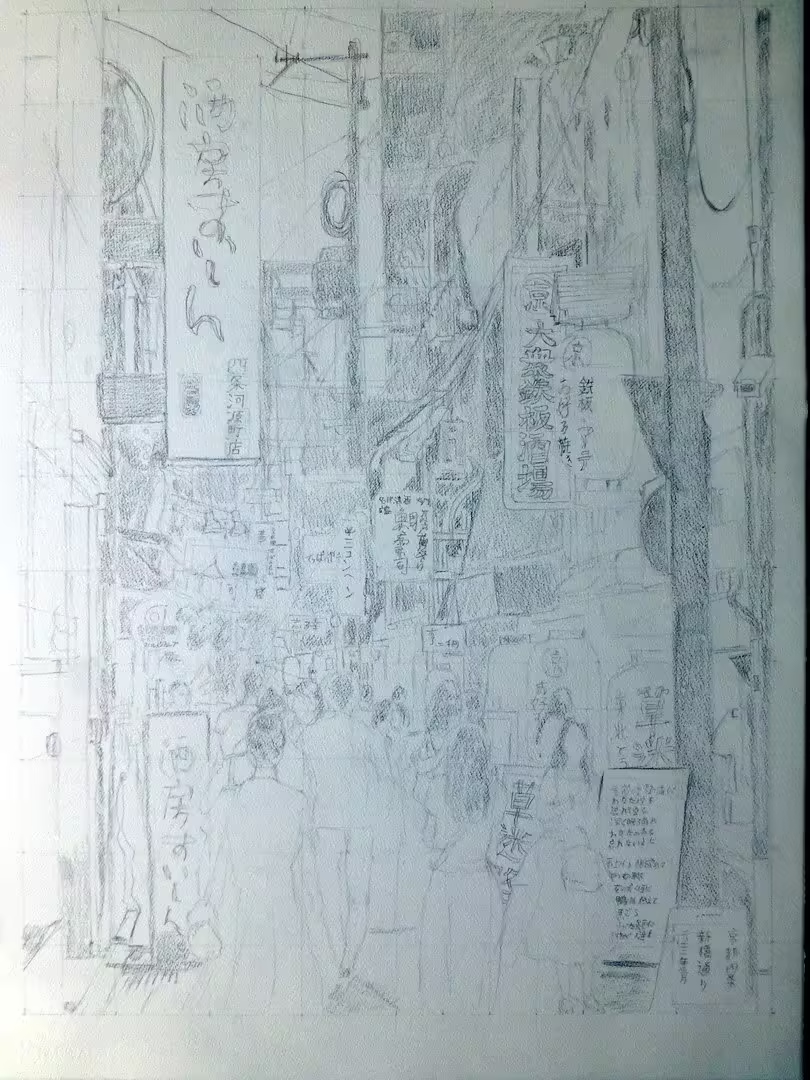
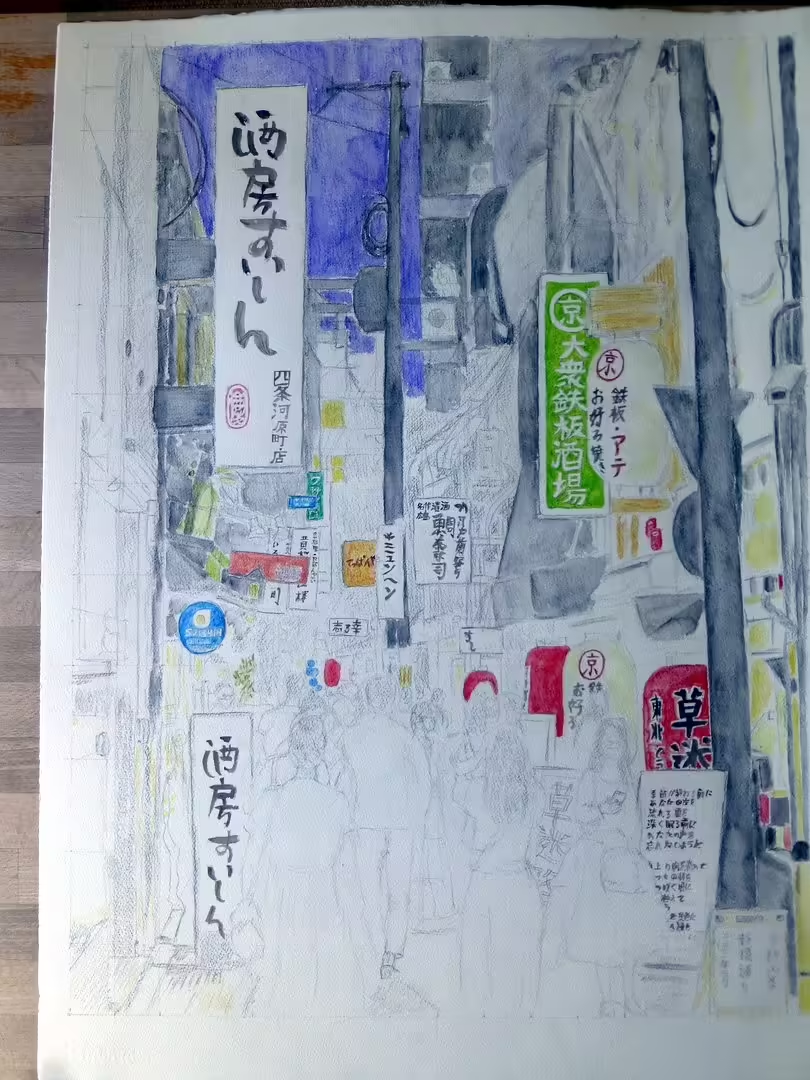
I like using watercolour pencils. You can apply the colour first like ordinary coloured pencils and then wash them. I usually don’t put on all colour before starting to wash. Maybe that would be more systematic but I tend to postpone the parts that I am unsure about.
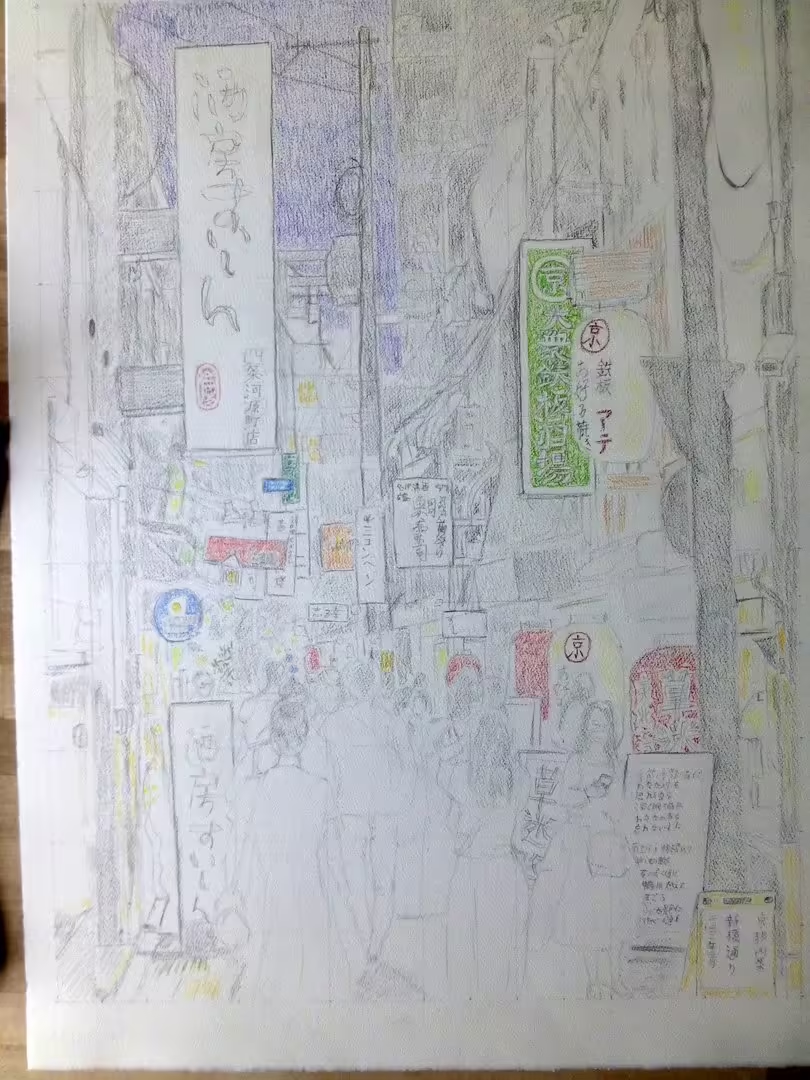
Colouring in a large drawing like this is much like completing a jigsaw puzzle. Until a certain amount is done it is really hard to say what it will look like, and finding the best way to colour in some small part is also a bit like hunting for the missing pieces.
Rules
I have a few “rules” for myself when it comes to drawing and watercolours:
- use rough, heavy paper
- don’t sharpen the pencils too often
- don’t use too fine a brush
- don’t correct mistakes
Look, that’s why there’s rules, understand?
So that you think before you break ‘em.
– Terry Pratchett, “Thief of time”
The banner picture shows part of the original picture I used for the drawing.
